Thanks so much for stoppin' by for today's
"Make Your Own Paper" Tutorial.
Ever been in the middle of a project and realized you just DID NOT have the perfect printed paper to finish your project?? If you hoard paper like I do, a statment like that is nearly impossible to believe, but it REALLY DOES HAPPEN! LOL
I don't know about you, but I have all kinds of wonderful digi images (lots and lots of Bugaboo to name a few) and TONS of stamps too. So one day when I was in the above said situation (okay, it's been more than once I've been in above said situation), I realized I have all the little items I need to create EXACTLY what I need!
What will you need you ask? A favorite stamp or two (digi or rubber work fine), some paper and ink - and we'll make some of our very own paper - just PERFECT for any project you're working on.
With Saturday's Har Repotter Set release and the Magical Tidbits set to go along with it, I've been inspired to make projects that involve these cute images. Like I said earlier, never read the Harry Potter books or saw the movies, but I just LOVE these super cute Har Repotter set Jodie created.
You can find them here.
So, because I haven't been able to find any Harry Potterish scrappy products, I'm makin' my own!!
To make your own Digi-paper -
Open whatever program you're comfortable using - I tend to use either MS Publisher or MS Powerpoint. For this Tutorial I'm using Powerpoint.
Size the image to your liking and make multiple copies of the image on the page - you can twist and turn the images to your liking. You can use the pan handles to adjust size and rotate too.
Once you have the paper that you want, print it out. I printed out my paper on yellow cardstock because I wasn't planning to color in the images.
And here's the final product - cute huh and heck, most people would never even know you made it yourself!
And a little up close look -
Here's another one I did digitally over the summer, but I colored the digis instead of just printing them on colored paper.
Jodie had some great little beach elements this summer (the Popcicle), and that made perfect paper for this card for my nephew.
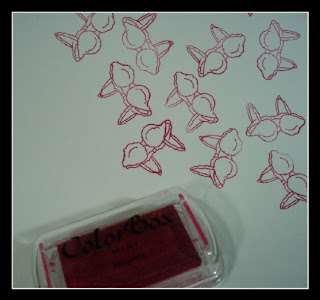
You can even do this the 'old fashioned way' with rubber stamps.
Yep, those little rubber things and that stuff that makes your hands change color. ;o)
For the Breast Cancer Awareness card I made last week, that's exactly what I did.
I had a bra rubber stamp that was a 'perfect fit' for paper to make this card.
I grabbed my pink ink and stamped away on a sheet of white paper.
Cut the size I needed and again, volia - a finished product.
Pretty cool huh? I hope you enjoyed this tutorial and go CRAZY makin' your own papers. If you have questions too, I'm happy to try and answer them - just leave me a comment.
I'd love to see what kind of papers and projects YOU create!!
Happy Hauntin' n' Craftin' Too!


Thank you so much for this tutorial! I am going to try to make my own digi paper :)
ReplyDeleteThank you so much Min ! I have got to try this ! Just fab ! Hugs and love from Catherine
ReplyDeleteThanks for the great tutorial Min! love it!
ReplyDeleteSuper cute cards! Thanks for sharing :)
ReplyDeleteAwesome tutorial Min!
ReplyDeleteMy sincerest thanks for a kick-ass tutorial Min-Min! :D MWAH!
ReplyDeleteGreat Tutorial Min!!!
ReplyDeleteGreat Tutorial, thanks..
ReplyDeleteSilverbutterfly