Showing posts with label Tutorial. Show all posts

Wednesday, December 19, 2012

Copic Blender Embossing Tutorial

Happy Tutorial Wednesday!!!
I wanted to share a little something I figured out tinkering with my copics the other day.
I love tinkering with products to see what out of the ordinary things I can do with them.
I'm sure someone has long since come up with this, but it's new to me, so I thought I'd share it with you!

It involves an Embossing folder, a Copic Color of your choice, a Copic colorless blender and some paper.
Color the amount of paper you're going to need with your Copic color
Get out your Embossing folder 
 Run your colored paper and embossing folder through your Embossing machine
Here is what your paper should look like after you've embossed it.
Take your colorless blender and carefully color over the bumpy part of your embossing - in this case it's the words that will be embossed. 
You may have to go over it a few times depending on how much you want your raised embossing to pop.  Here I went over it 3 times.  Of course you could do it more.  Totally up to you and what you're trying to accomplish. 
It's kind of hard to photograph, but you can see the raised embossing is a bit lighter than the actual background.

Thanks so much for coming by today to check out this little tutorial!
I hope you enjoyed it and give it a try.

Hugs & Happy Days!


Wednesday, September 19, 2012

Felt Rolled Flower Tutorial


I can NEVER enjoy enough flowers - Real, Artificial and even FELT Flowers!
Some time ago I did a tutorial on how to felt flowers by layering shaped felt - yep, I love me some felt!  

Well, I've been trying to use up lots of supplies in my studio (so I can justify adding more to my stash) and my FELT is something I've been trying to use up.

So, I'm gonna show you how to make some cute ROLLED flowers out of felt today.  Yes there are dies you can purchase to make these flowers, but why spent the moolah on a die when you can do the same thing with a few extra minutes, a piece of felt, some sticky tape and a pair of scissors.
Really - this is All you need!  
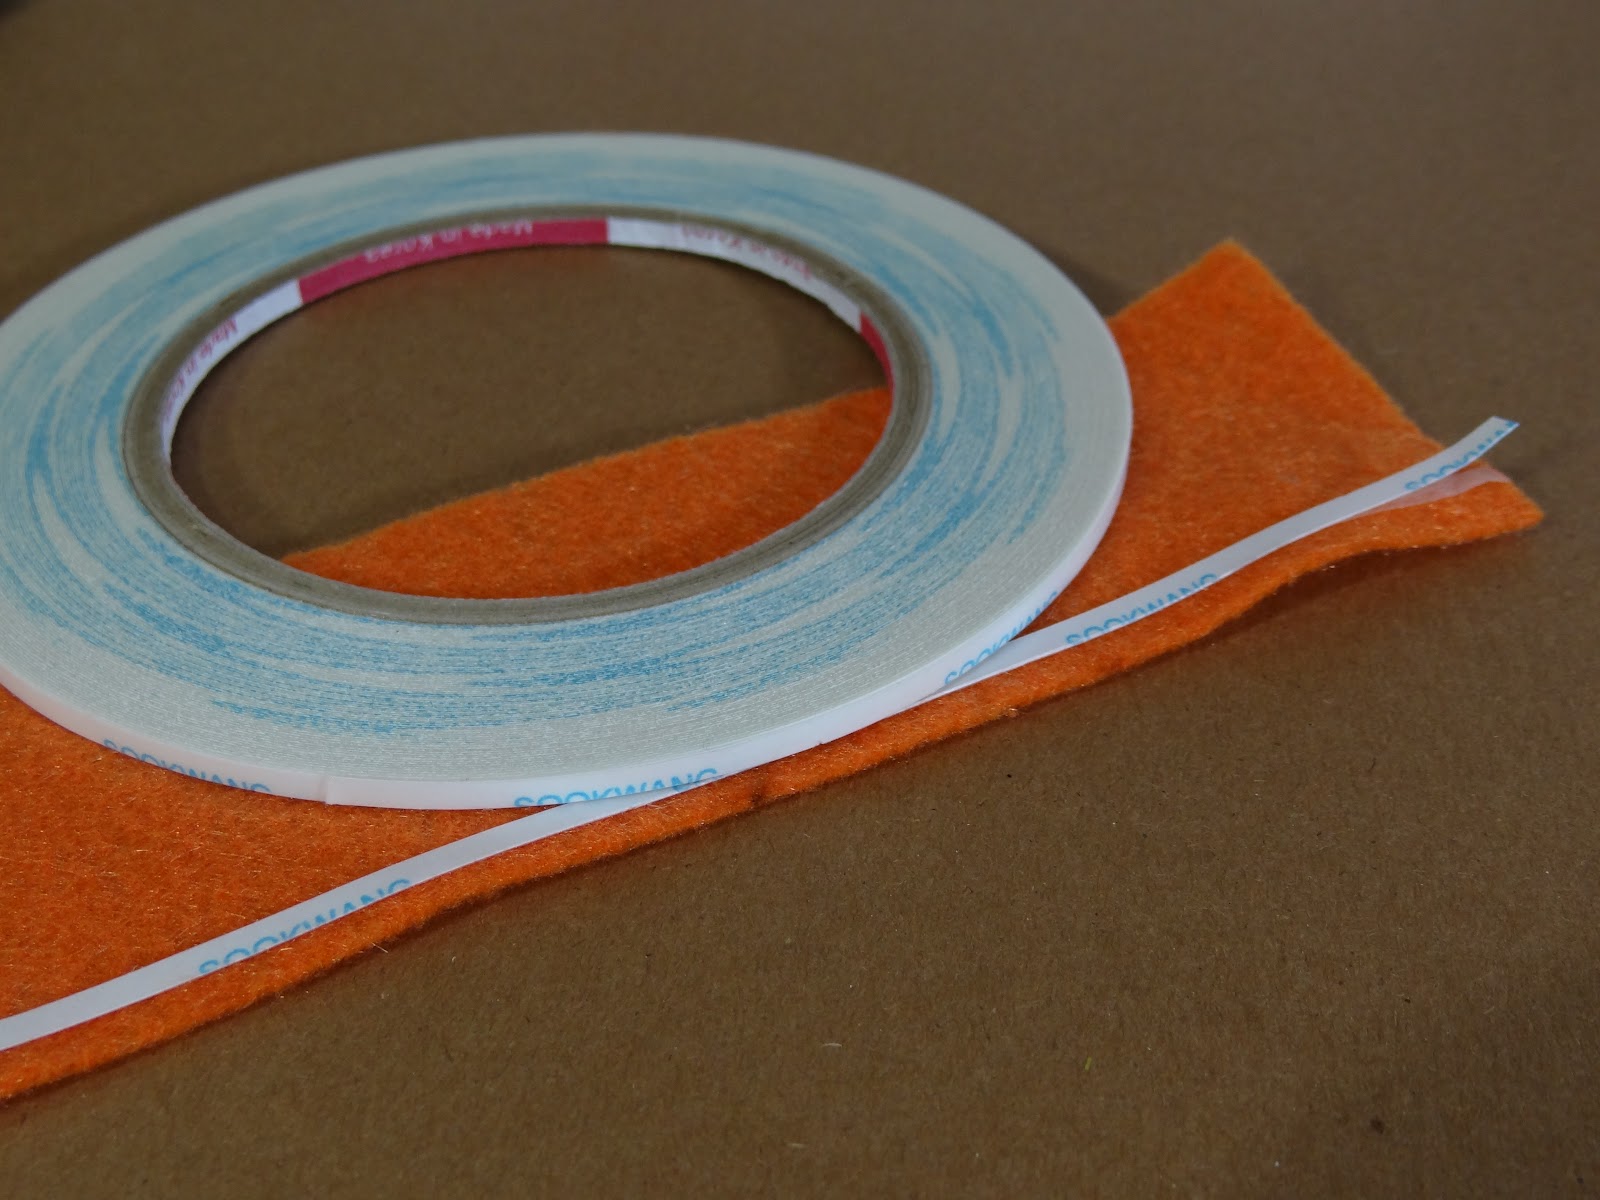
Piece of Felt, Super Sticky Tape and a pair of GOOD scissors that will cut 2 layers of felt.
So, here's a little pic tutorial step by step - Please ignore my nails that are in terrible need of a manicure.  =)
Okay, so first, cut a piece of felt about 7" long and 2" wide.  This size will change depending on how BIG you want to make your flower.  The more you make - you'll find which size and style works for you.
I like to make mine small enough for cards.
Along one LONG edge, use Super Sticky Tape to run the entire length.  I use the 1/8" Scor-Tape - thanks to my sis Shelly, I LOVE this stuff
Fold and stick down the second untaped long side against the taped long side.  Make sure the tape is stuck WELL!  This flower will be roughly 1" high when complete.
Grab your scissors and snip the folded side of the felt about every 1/4" about 3/4 of the way down. 

 Do this for the entire length of the felt piece.

This is where the FUN begins.  Begin rolling the flower.  I usually put some type of glue right in the beginning (so it sticks) and then a good amount of tape at the end.
 ROLL ROLL ROLL until you get to the end of the flower.  
Make sure it's good and stuck together.  
This is a pick of the bottom of the finished flower.  You can glue a round piece of felt to the bottom if you want - if I'm putting it on a card, I just stick some good sticky on the bottom - no need for extra felt.

Now you can tinker with the petals and make it look like a flower.  You can add button in the center, bling, or just leave it along like I did on this one.  
VOILA - here you go!  Add this cute little sucker to a card and brighten someone's day!
Be sure to check back on Thursday and see the finished card with this flower.

AND - if you like this cute little rolled flower, you can jazz it up a little bit and make this fun SPIKEY Flower (pretty unique name, huh).  This flower is made by cutting ALL the LOOPY part of the flower once you've rolled and stuck it.  I added a little bling into the center of this one for a snowflakey look.
So there you have it - your own little felt flower garden for your cards!
Hugs & Happy Days!


Wednesday, February 29, 2012

A Tutorial in Coloring....

Happy Hump Day All!  I hope it's a good one!

With some of the neat "Silouettes" digis from Bugaboo Stamps, I thought I'd give you a quick crash course in recoloring the black and white version to making it the color you want.  I mostly use the free GIMP download for this, but there is also a simplier way if you're a bit apprehensive about trying photo/design editing software - Microsoft Publiser.
I BELIEVE you may be able to do something similar with MS Word also, but I have not personally tried it.

Ready?  Set?  LEARN!
(You can click on the images below to make them larger and better read the commentary along the right side of the frame.)

Open a NEW page and Insert the digi you wish to recolor - this is PERFECT for the Bugaboo Stamps "Silouettes" digis.
Left Click on the image and then right click to get the drop down menu.
You'll highlight "FORMAT PICTURE"

 This will be he next pop-up sreen you will get - click on the "RECOLOR" button.
 Click on the Color Box with te aarow and it wll give ou a "Color Picker Box" (yep, that's a technical term! =)
Select "MORE COLORS"
Choose your color and then click OK - you can choose a Standard Color or you can Customize your color - up to you - but THIS is the pop up bx you do it in.

Be sure to click OK once it show you the clor.  You'll click OK on the Format Picture bo also and it should turn your pic the color you picked.

After you've clicked OK and the pop up boxes have gone away, this is what you will be left with - all you have to do is print and attach to your project now.
Voila!
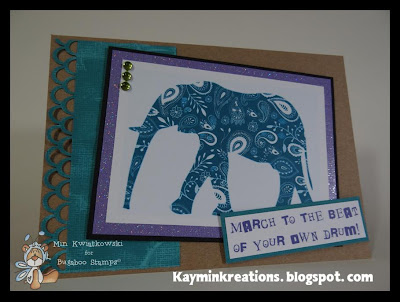
This is a card I did some time ago and I just LOVE how it turned out -
This however was colored using GIMP.

Image - Bugaboo Stamps - "Silhouttes" Collection "Elephant" image
I hope this tutorial has helped you today - please feel free to leave me a comment if you liked this tutorial, if it helped you, if you have questions or if you flat out hated it.  I love your input!!
Hugs & Happy Days!

Wednesday, October 19, 2011

Today's Tutorial

Happy Tutorial Wednesday everyone and thanks so much for stoppin' by to check out what I've got to Yakkety Yak about today!  :o)

I don't know about you, but I LOVE RIBBON (and buttons and bling and and and.....LOL)
I'm always looking for something uniquely different that I can do with ribbon.  Well, today I'm going to show you how to PERFECTLY MATCH your ribbon with your projects.
How to do that you may ask?
Well, grab your favorite ribbon and a Copic Marker of your choice, a piece of thick scrap paper to keep your table clean and let's get started.

Determine how much ribbon you'll need and start coloring - I used the broad end of the marker to color.  Be sure to color on the scrap paper because the ink WILL LEAK THROUGH!

Color the amount of ribbon you need - as it dries, it will become uniform in color.

Cut the ribbon and create with it - here's the final project I created using my matching ribbon - This was for our Distressed/Shabby Chic challenge a few months back, so I just added a little ink and Voila - Shabby Chic & Distressed
Just a quick note - your ribbon will likely become a little stiffer after you color it - just be patient & work with it--you won't be sorry! 

So far I've tried it on this heavier ribbon, as well as the whispy see through ribbon (can't for the life of me think what it's called).  So, now I have a variety of white ribbon in my stash tht I can color up at a moments notice.  =)

Feel free to leave me a comment or email me if you have questions.
Thanks so much for stoppin' by for today's Bugaboo Tutorial.
Hugs & Happy Days!
PS - This and all Bugaboo Stamps shown on my blog can be purchased at The Bugaboo Store!

Wednesday, May 11, 2011

All that Glitters Tutorial!

 Welcome to Half Way to Friday!  =)
I don't know about you, but other than stickles, I tend to AVOID loose glitter as much as I possibly can.  Everyone in my family wears it when I get it out - including my hubby and furbabies.  However, today, I'd like to share with you a fun way to adhere glitter to your cards, and hopefully not share TOO much with the rest of your family to wear!
Three items I use - loose glitter, Sakura Quickie Glue Pen and Tacky Tape
I started with this cute Rose Flower Name image (this was last Friday's Freebie you can STILL get it).  I attached two pieces of the double sided Tacky tape in the two corners of this image

After removing the red film from the tape, I sprinkled it with the loose glitter (be sure to use a piece of paper to catch any run away glitter.  Tap excess glitter off.

 Below, I decided to add glitter to the purple flower part of this mage.  I colored my image first with my copics and then used my Quickie Glue pen.  I colored small sections at a time and didn't color over the black lines, so they would stand out after the glitter was added.  After each small section was 'colored' with the quickie glue pen, I sprinkled the glitter and then tapped off excess glitter. Repeat until image areas are glittered as you wish.

Here is a close up photo of the glittered strips and the glittered flower (kind of hard to see).

Here is the final product - it's hard to see the glittery part of the glitter, but it looks gorgeous in real life.
I hope you enjoyed today's tutorial.  I'm happy to answer any questions you might have - feel free to leave me a comment.
Don't forget to stop by the Bugaboo CDAC & PCP groups today too for our new Wacky Wednesday Challenge! 

You don't want to miss it!
Hugs & Happy Days!

Wednesday, April 27, 2011

April Showers.....

Bring May Flowers!!!
YEAH!!  Can you believe that May is RIGHT around the corner??
The flowers here in Michigan are starting to bloom, and as they should with the WEEKS of rain we've been getting!  I can't wait until the sun begins shining on a regular basis and I can get makin my Sun Tea is on the deck!  :)
Well, today with the inspiration of all the flowers and all things SPRING and WONDERFUL, I wanted to show you how to make these super cute little Felt Flowers I've been creating and using on my cards and other projects!

Ready for a flower garden of your own?
I don't know about you, but sometimes I just can't justify spending $$ on embellishments I can easily make for MUCH less (and they're much CUTER too I might add!) 
That's where these flowers came from.

You'll need:
  • A piece of felt (or multiple pieces in different colors)
  • A circle/blossom or flower shape nestie (if you don't have nesties, you can use scissors, or other types of diecutting shapes)
  • Bling/Button (floss) or Brads (I used my iRock on the Pink one and a Button on the Orange one)
  • Fabric/Craft Glue
  • Crop-a-dile or hole punch
  • IMAGINATION!!!
So, cut several layers in your felt.  Here I used my blossom nesties and cut three layers, each a different size.


 Taking your Glue, I put a dab of glue in the center of each layer, except for the very top layer, sticking each piece together as you go.


Add your bling to the center of your flower - 


and VOILA - Super CUTE, Instant Flower!

If you're using a Brad to connect layers together, PUNCH a hole in the center of your flowers.  Attach brad to flower.  For Buttons - add your button to the center and get our a needle and thread and sew button through all layers of the flower.

 A flower similiar to the orange one was used on my Hippie Chick Card the beginning of the month.
And here's the final product on a card -
Image - Bugaboo Stamps "Dottie" Hippie
Paper - DCWV Paper Stack, Bazzill & Kraft
Coloring - Copics
Tools - Nesties, Cuttlebug, Needle & Floss
Extra STUFF - Button, Doodling & Dimensionals

These are super quick to make and super fun too!  I hope you enjoy making yourself a little Felt Flower Garden!
Happy Spring!